
Saving Projects
Saving a Shipment
After selecting a Space and placing your items inside, enter a name in the Shipment Name field at the bottom panel. Then click the save (disk icon) to store your work as a shipment.
The lock status and each item's space restrictions are saved with the shipment.

Viewing Saved Shipments
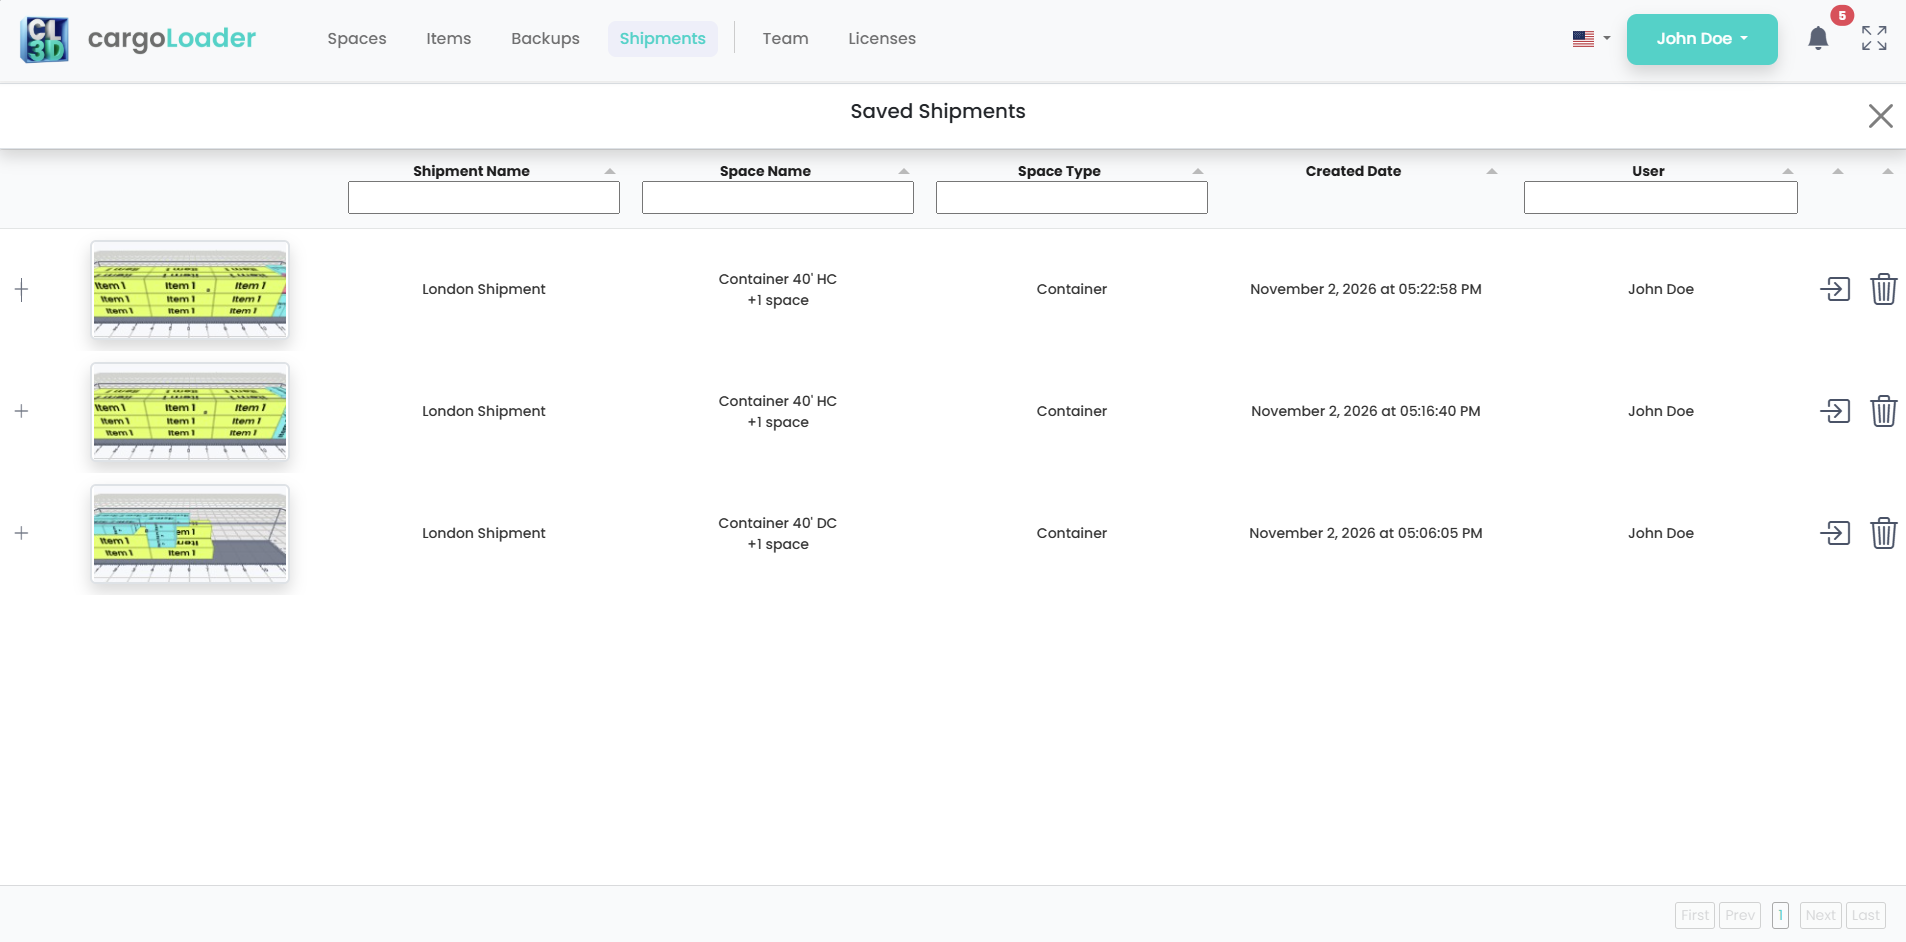
Once saved, open the Shipments tab in the top menu to see all saved shipments in the Saved Shipments window. Each row in the list shows the following:
- Shipment Name
- Space Name: the first space in the shipment. If the shipment has more than one space, the number of extra spaces is shown below it (for example, +1 space).
- Space Type
- Created Date
- User: the person who saved the shipment.
You can sort the list by clicking any column header. You can also filter it by typing in the search boxes under Shipment Name, Space Name, Space Type and User.
Viewing the Spaces in a Shipment
Click the + icon on the left of a row to expand it. Each space in the shipment then appears as a numbered card showing a preview, the space name and the space type. To open the shipment with a particular space shown first, click the open icon on its card.
Row Actions
- Open (arrow icon): loads the shipment into the planner.
- Delete (trash icon): removes the shipment from the list.
If there are many saved shipments, use the First, Prev, Next and Last buttons at the bottom to move between pages. Click X in the top-right corner to close the window.
