Bulk Import Cargo Spaces via Excel
Cargo spaces can be imported into the system in bulk using an Excel template. This feature allows users to quickly add multiple cargo space definitions to the database without creating them manually one by one.To import cargo spaces, download the Excel template, fill in the required fields, and upload the file through the import interface.
Access the Spaces List
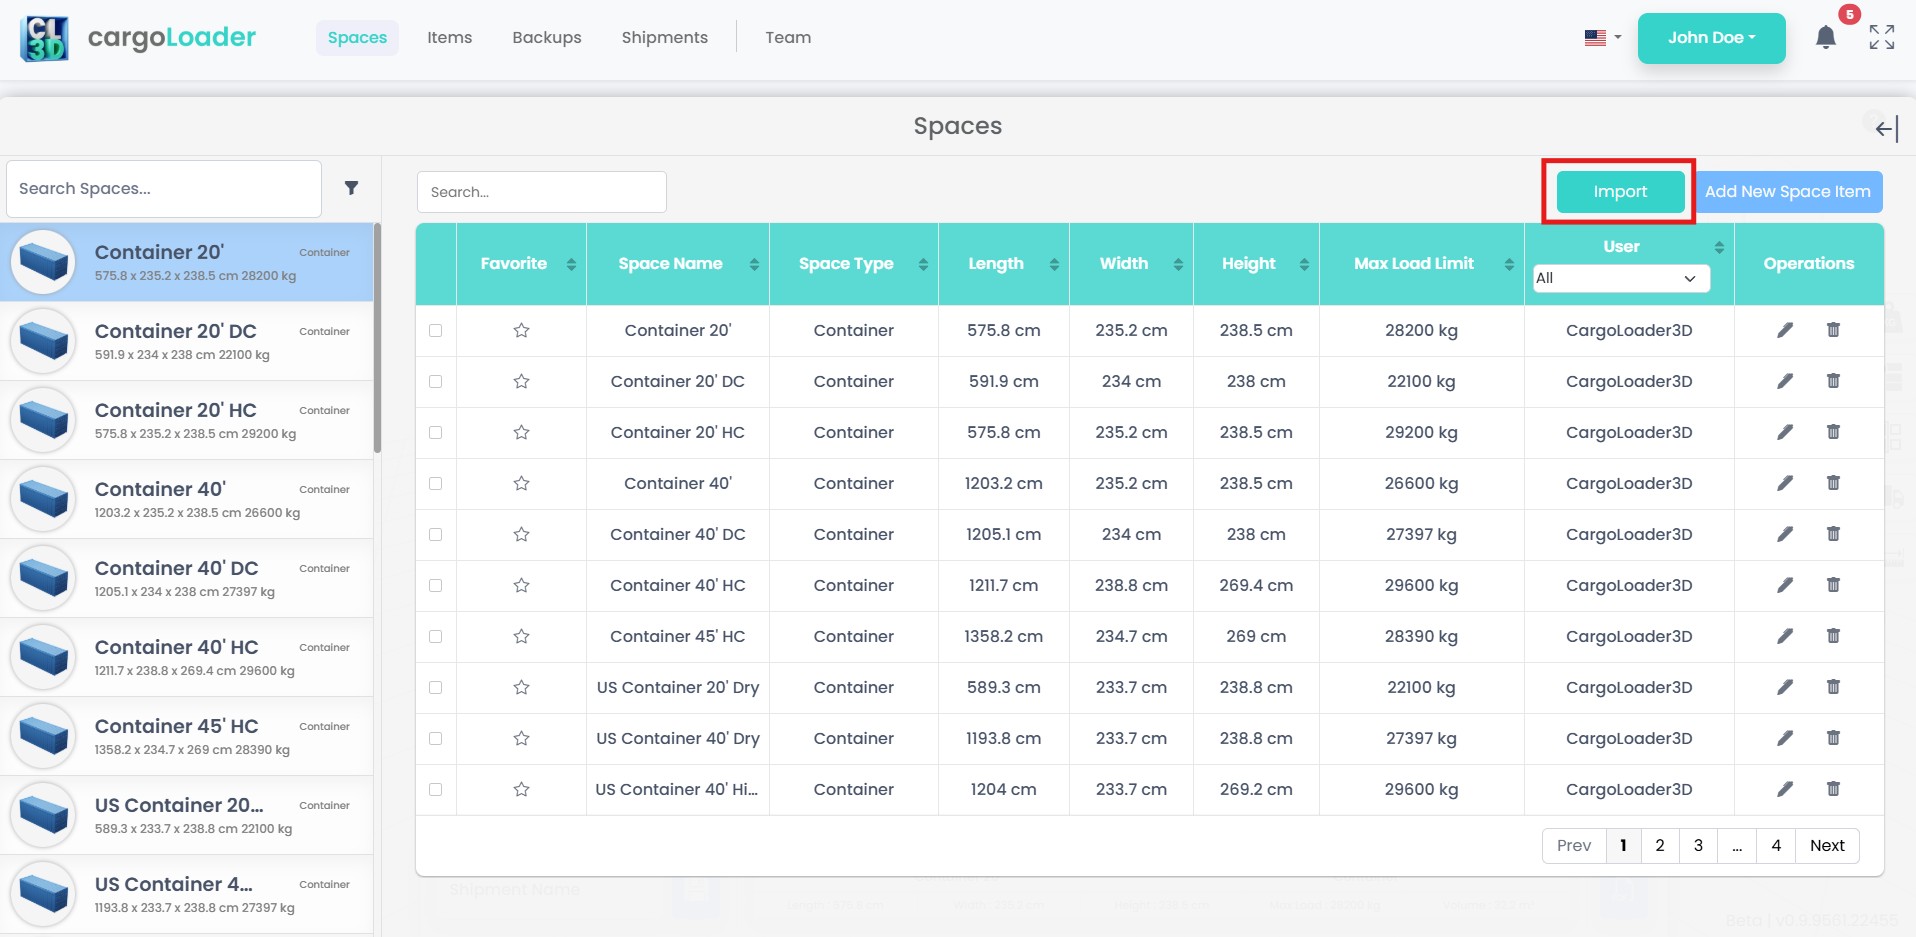
Go to the Spaces section. Here you can view your existing cargo spaces, add new ones, or start a bulk import from Excel. Click Import Spaces (top-right) to open the bulk import screen.
Excel Import Screen
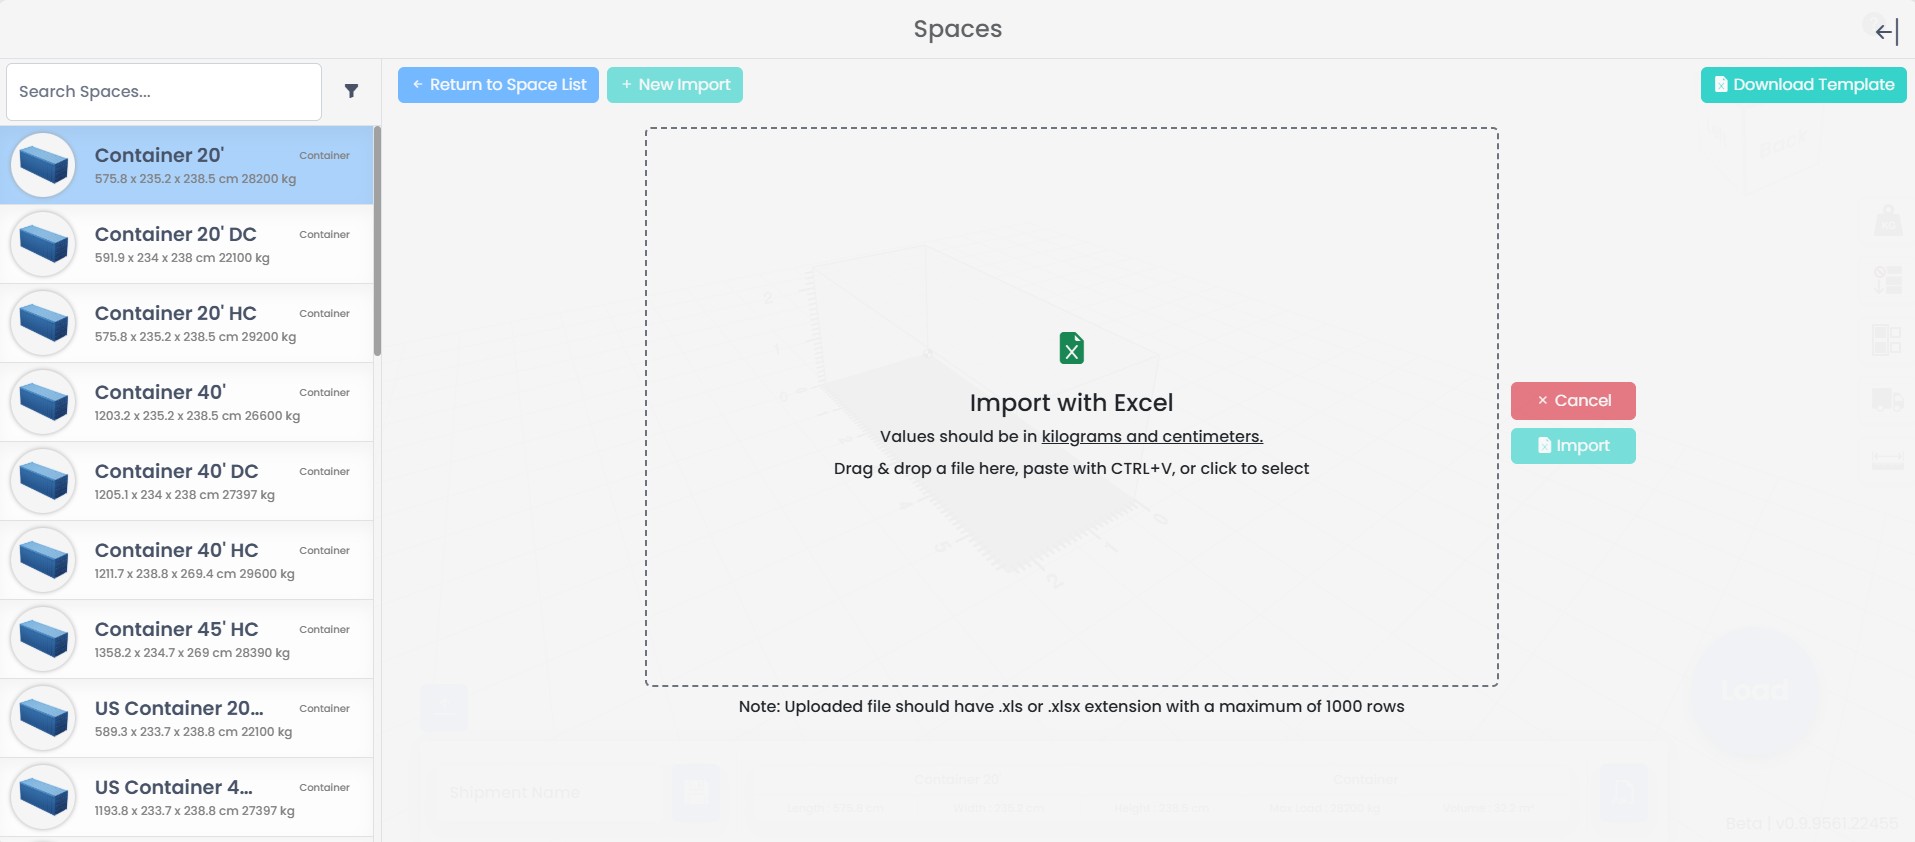
- All values must follow the user’s unit settings.
- Maximum 1000 rows are supported.
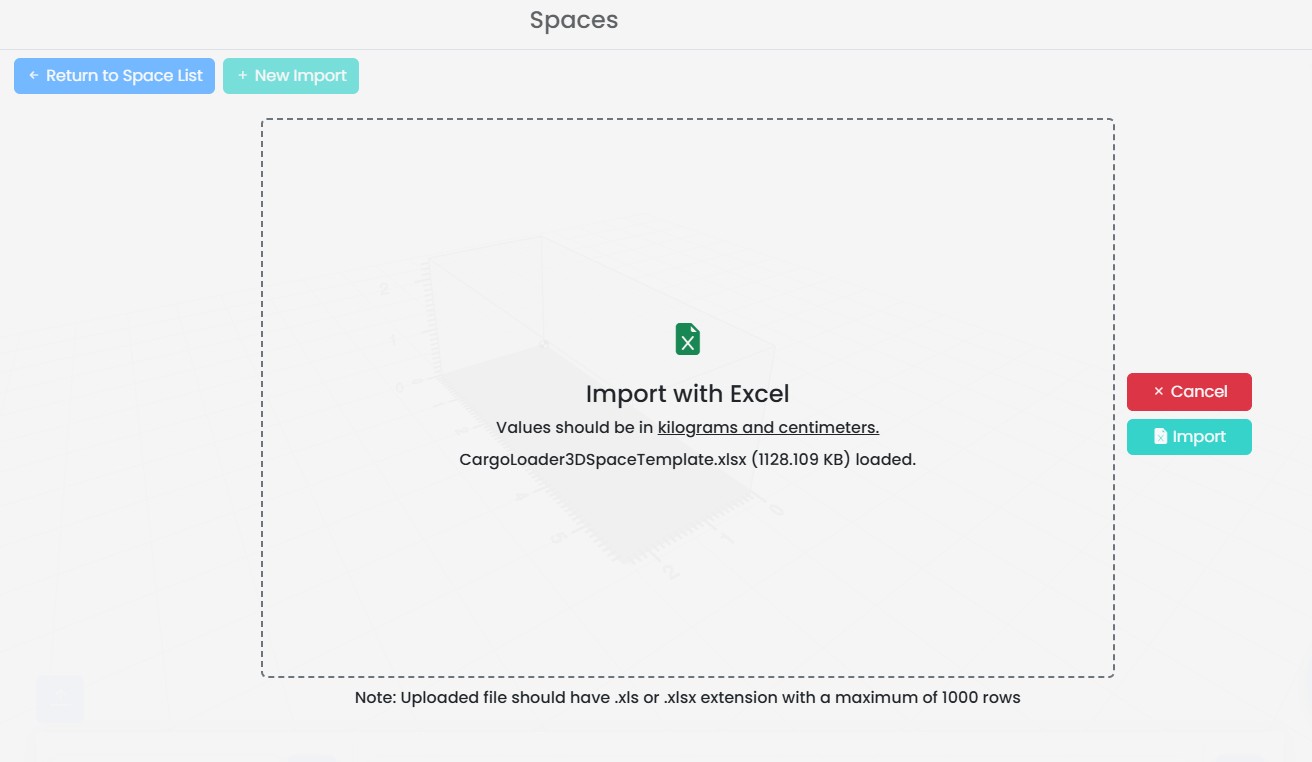
- You can drag & drop your file, paste with CTRL+V, or select it manually.
The import screen asks you to upload an Excel file (.xls or .xlsx).Key points:
Download Template
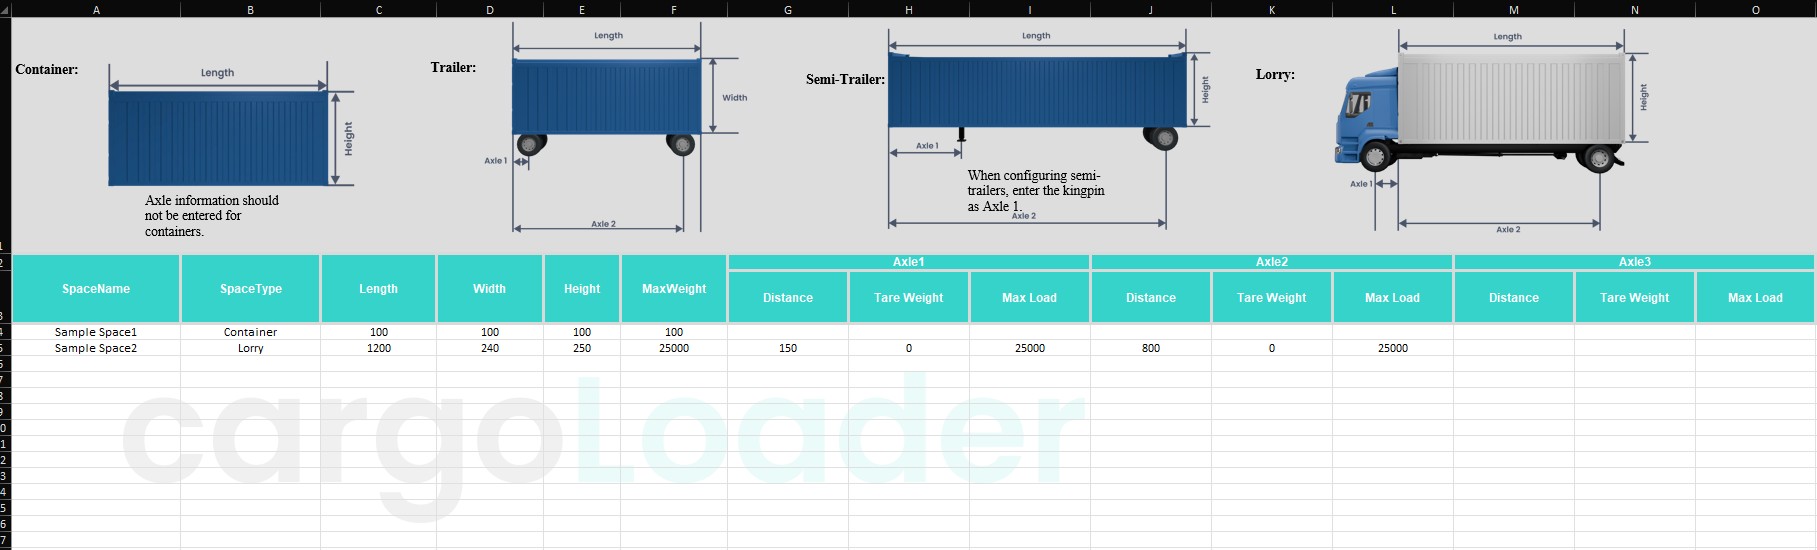
If you’re unsure about the correct format, click Download Template (top-right).This gives you a ready-made Excel sheet with the required column names, preventing errors like missing or misnamed columns.

Excel Template Structure
The template includes several columns that define the properties of each cargo space.Common fields include:
- SpaceName – The name of the cargo space.
- SpaceType – Type of space (for example: Container, Lorry, etc.).
- Length – Internal length of the cargo space.
- Width – Internal width of the cargo space.
- Height – Internal height of the cargo space.
- Axle Distance fields – Distance values between axles if applicable.
Sample rows such as Sample Space 1–2 are included as examples.
Prepare, Upload, and Check Results
1.Prepare Your Excel File

2.Upload the File
After uploading, press Import to load your data into the system.
3.Check Import Results
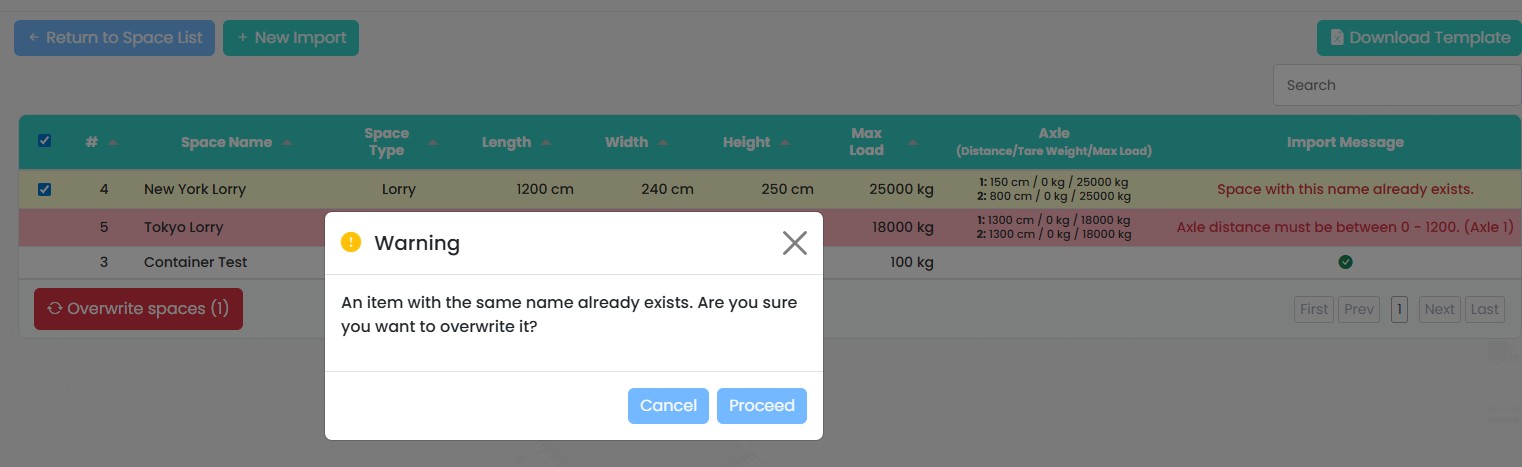
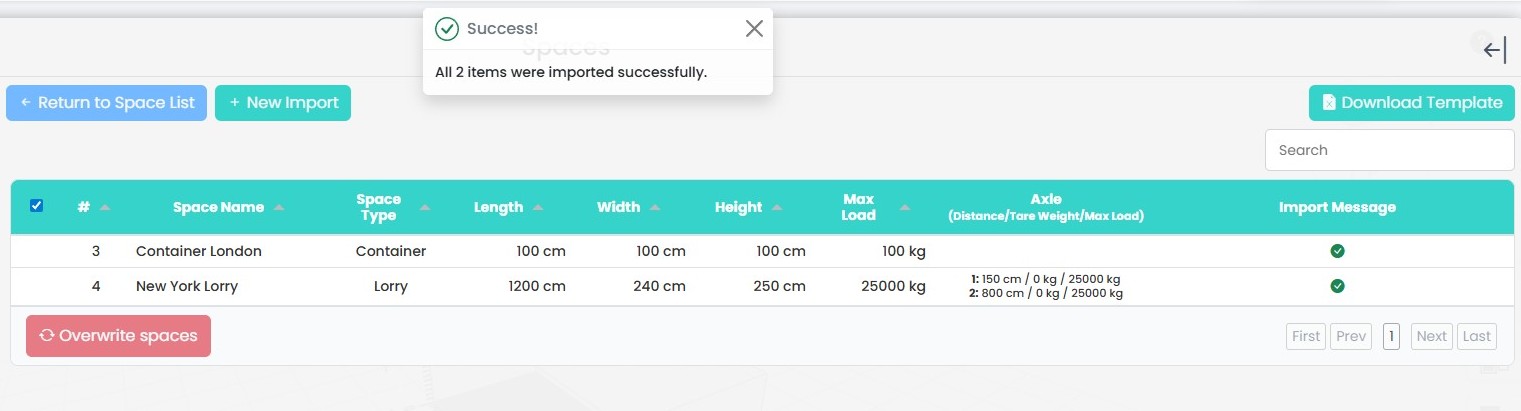
Successful Import
Failed Import
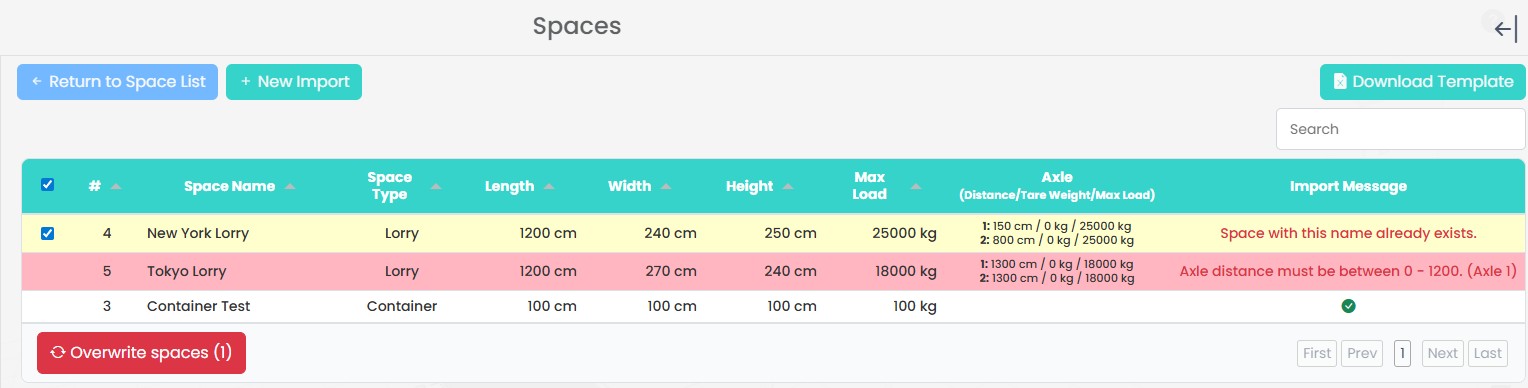
- Space with this name already exists – A cargo space with the same name is already present in the database.
- Axle distance must be between 0 – 1200 (Axle 1) – The axle distance value is outside the allowed range for the specified axle.
4.Overwrite Button
The Overwrite spaces button allows users to replace existing spaces in the database with the values from the imported file. When this option is used, the system checks whether a space with the same name already exists and displays a confirmation dialog.